ASSESSMENT 2 PROCESS [ #DES100 ]
- Michael
- May 16, 2020
- 5 min read
Design Brief
Design and prototype a lamp for a friend or family.
Target User
Who are you designing for? Identify your target user
For my assessment 2, I will be designing a lamp for Dana Lee, my sister. I want to design for my sister as she was wanting to re-design her whole room, so I thought it would be interesting to create a personalised lamp for her.
Interview your target user
Understand who they are (demographics, values, etc.)
Interview Questions and Answers.
What do you need a lamp for?
“I like to use a lamp at night inside of the actual light because it helps me wind down and it helps me fall asleep and get ready to go to bed and also I don't have to get out of my bed to turn the light switch off.”
Any specific styles you want?
"I'd like something simple."
What other desires do you have?
“I also want my lamp to be part/used as room decor as a part to decorate my room.”
Are there any particular things you like/Want me to include?
“Some colours I like are blue and purple or just pastel colours in general. Things I want for my lamp would be like butterflies."
Contextual inquiry


This is currently Dana's bed side table, it is a simple white and blue draw. There is currently nothing on it because of she does not have any decor for her new room that she wants to re-design. So for my lamp, I will be creating a size that takes up a less than half of it just so she can be able to put other things on top of the surface.
Inspiration and secondary research
Explore what other related lamp designs are out there. Create an inspiration board
I created a board on Miro to help as a research mood-board including both inspiration and secondary research.
Below is my Miro board & link to it.

Direct Link: https://miro.com/welcomeonboard/eKfJO4xzAId6byeFeifm66JjsjHbP92m9364p5C0m7JUMiZkzROBtuwr91jSvYjU
The link is also attached to the submission on Canvas.
Summary of Interview & Observations
From the interview, I was able to find a clear idea of what Dana wants. She wanted a simple lamp that was also aesthetically pleasing, so I decided to first make the lamp white as a it can be simple but use a LED light bulb instead of a regular one as it may be too simple which could lead to boring, so the LED light bulbs can be used which could also make it look like the lamp is a different colour every time. Also she said she liked butterflies so the whole theme of the lamp will be butterflies, I want to try and make it look like butterflies are on the lamp/surrounding. This is my initial thought process going into it.
Create a design statement
Clearly summarise your findings and create a design statement that outlines the problem you will be designing a solution for. How is it personalised and uniquely for your target user?
Dana needs a new lamp to help her fall asleep at night but the lamp also must be aesthetically matching and appealing to her because she wants it to be part of her room decor.
What will you make?
Ideation
Share initial brainstorming/ideation sketches and storyboards. Get feedback from your user to see which they like. Pick one with them to prototype.

This is the first initial sketch I created. I just drew a bunch of different designs of lamps with butterflies. From these sketches, my sister liked the following ones and wanted the elements from these sketches into one.
For the base, she wanted me to use the 2nd one - a cone like shape with the pole then for the top part she wanted a mix of the first one and the second one where it looked like the butterflies were attracted to the light bulb.
So from this feedback, I created this sketch.


Then I created a prototype for this sketch using paper and other items to create a physical model.
Visualisation Prototype Process
create a mockup of your design in order to get aesthetic feedback from your user.
I first got a selfie stick and wrapped my LED strip lights around it and covered it with A4 white paper.

Following this, I created a dome like shape so that I could cover the LED lights and create the design on top of this.

I used a cut out of a butterfly I drew to use as a stencil so I can try and make it even.
I stuck the butterflies onto the dome and used it as a "shell" to go over the light.
I also filmed a time-lapse to watch my progress after.

I then attached the top part to the base and created my final prototype.
Visualisation Prototype
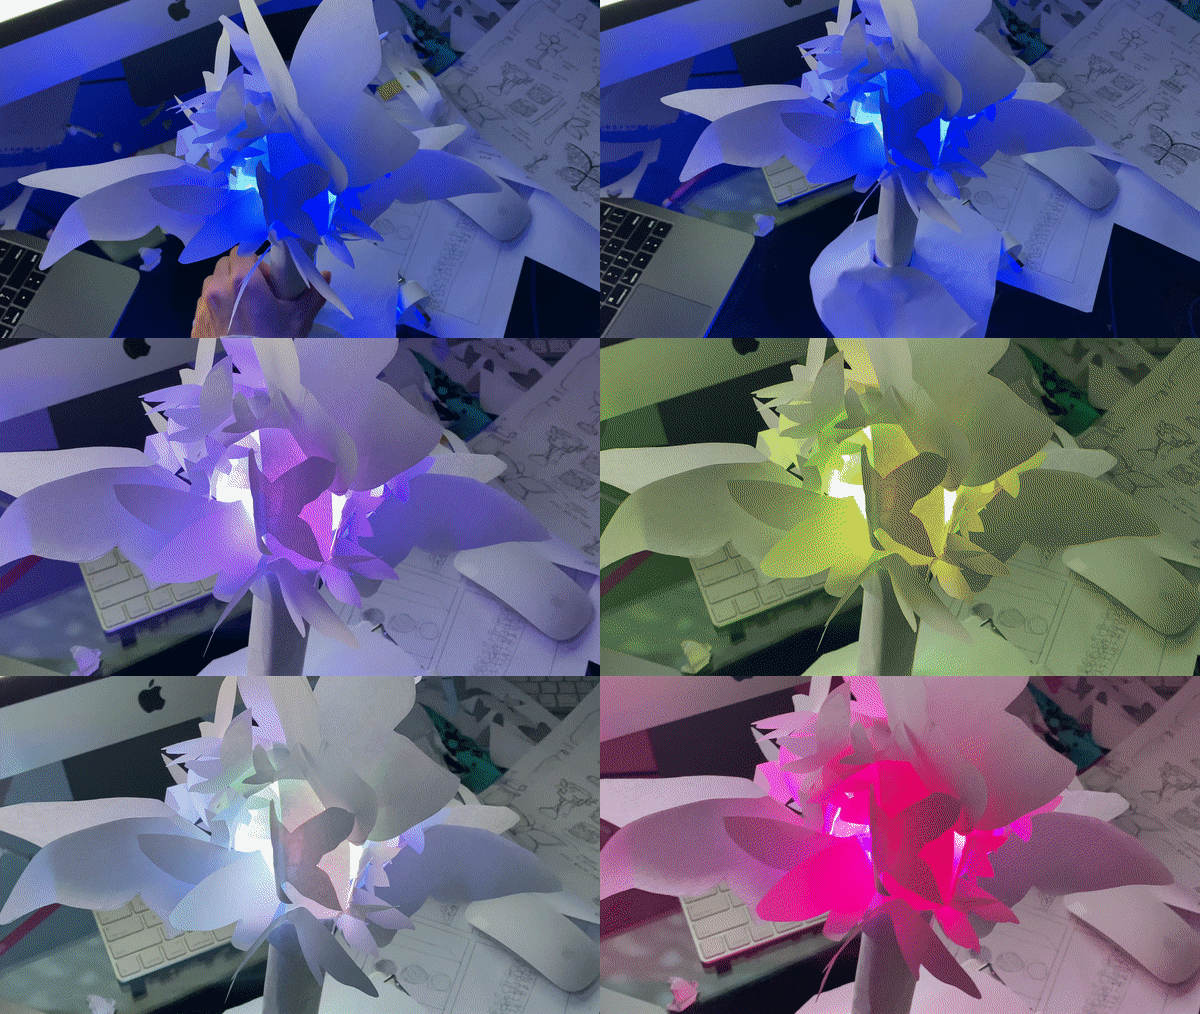
This is the prototype with different LED colours.
Feedback From Prototype
From my prototype, my sister liked how the butterflies were placed - however, thought there were too many butterflies, then on top of that she didn't like the base of the lamp. I’m going to make a couple of changes based on my feedback.
Specification Prototype
create everything you need for a physical mockup that you could create in the FabLab.
This is my specification prototype, I used FUSION360 to create a digital prototype.

From this prototype, the feedback I received was that she did not like how the circles creating the base for the butterflies looked, so I made another prototype with a clear sphere to create a more clean look.

For this FUSION360 file, when covered into a STL file ready for 3D printing the clear sphere is not emulated which means that if I were to print it out on the 3d printer, I would use the 1st prototype with the lines to make it easier to cut out the lines and stick the 3D printed butterflies to a clear sphere.
The STL file has been attached to the submission on Canvas.
Circuit emulation

I created an LED RGB circuit emulation with a button.
Materials Analysis & Selection
Provide an overview of what materials and tools you need to make a physical prototype of the lamp in the FabLab.
For me to make this physical prototype of the lamp in the FabLab, I would need to use the 3D printing machine to print out the base of it, this would make up most of the lamp. Other materials I would need to make this prototype would be a sphere ball to place around the light bulb and for the colours to change, I would need to have a LED light bulb with a remote control to control.

If I was to make this prototype in the FabLAB, I would need all the materials listed above. First I would create the base using the STL file of my prototype created on FUSION360 through the 3D printer using the Ultimaker PLA material and then I would have to cut off the circles holding up the butterflies. Then I would place the glass sphere over the light bulb and glue on the butterflies onto the sphere. Add circuit and all done.
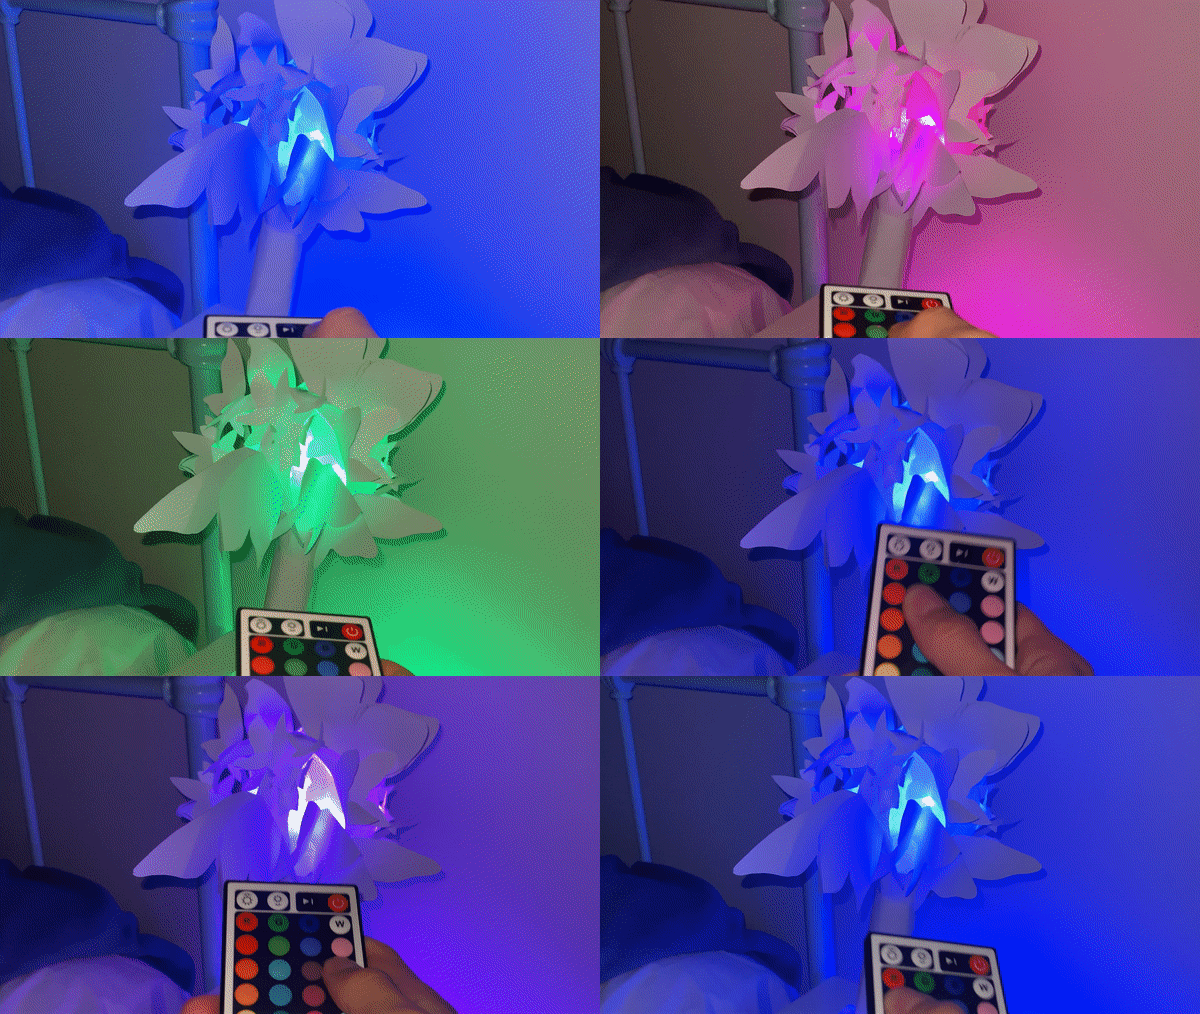
How to use the lamp is through the LED light remote control used to control the colours. Just plug in the lamp into the wall and change the colours through the remote.
This is where the lamp would be on the bed side table

.


Comments